Wood technology
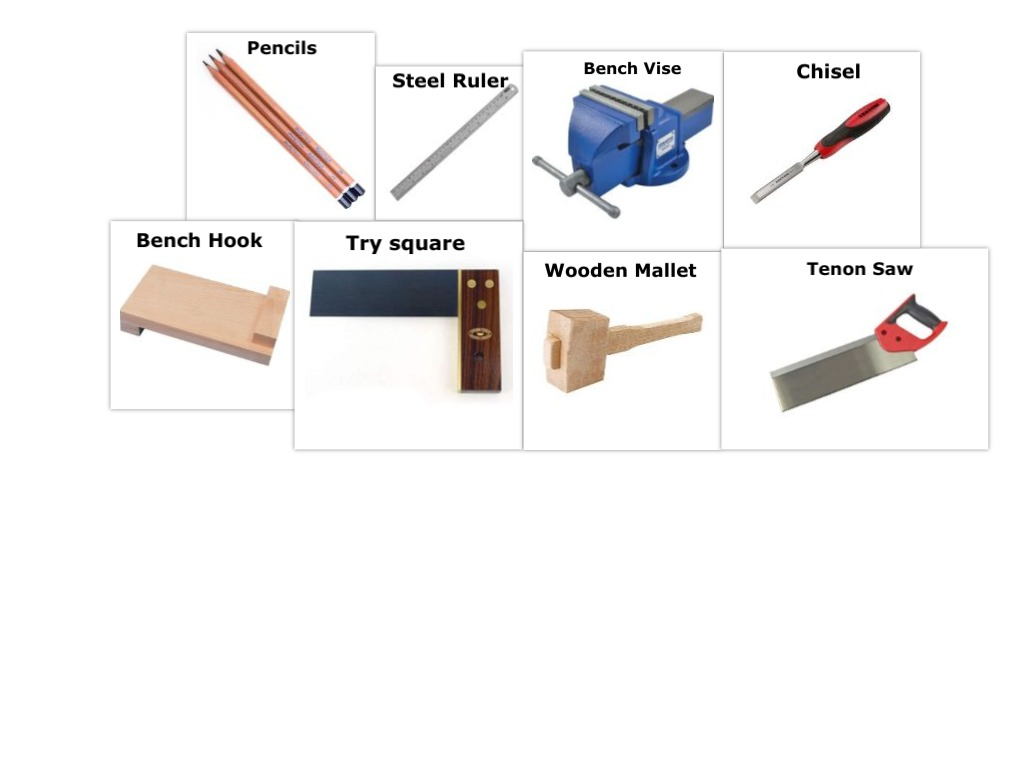

Today in Wood Technology, my class and I were learning how to make a Dovetail joint. The tools I used in class was a Tenon saw, a Wood Chisel, Wooden Mallet, a Try Square, a Bench Hook, a Bench Vise, a Steel Ruler, and a Pencil. In the process of making the Dovetail joint, I was first given a (170 mm) block of wood. The next step in the process was to cut the block in half with a Tenon Saw, with one side measuring at (80 mm) and the other with (90 mm) using a ruler. After that, I used any of the 2 blocks I had to measure the other one with (15mm) all around using my pencil to draw the lines. At the very end of the block, I measured (20 mm) from left to right than vice versa. I also did the same with where I measured the line but instead by (15 mm) from left to right than vice versa again with the ruler. I then connected the two dots together on both sides as well as the top using a ruler and the try square so that all my lines were straight. Once I was ready, I used a Tenon saw to cut down the lines, I made sure to cut outside all the lines. The next step was to make a joint. I used the first joint I had to measure the other block so that it would fit perfectly using a ruler and a try square. Once I had measured the block, I used a waste block to put behind my block so that it wouldn't break. I then made sure that my block was in line perfectly with the bench vise and started chiseling the block inside. This joint was used to connect with the other joint I had as a practice in making a real wooden box.
0 comments:
Post a Comment